Showing posts with label Holidays. Show all posts

11.02.2010

Poinsettia Pillow Tutorial


I cannot wait for Christmas.  The music, the tree, the ornaments, the music, the food, the cookies, the music...  Seriously, the music was worth mentioning three times.  I love it.  I am also excited for Christmas this year so I can legitimately display the Poinsettia Pillow I created for... $3.  Yep.  The inspiration came from a Pottery Barn pillow in the most recent catalogue.  The PB pillow is $29, which in my opinion is expensive for something that can only be displayed for one month of the year. 

Anyhow, want to make your own Poinsettia Pillow?  Here's how:

First of all, you'll need :
1/2 yard of ivory felt  (from this cut 2 16"x16" squares)
1/2 yard of ruby felt 
coordinating embroidery thread
5/8" hem tape (aka fabric tape, fabric fuse tape, etc.)
20 6mm bells
sewing machine (for sewing pillow)
pillow form or poly-fil

And before we get started, here are a few things I'd like to share.  First of all, I did not include my pillow form in the cost of the project because it can be reused year round with other pillow covers. It's a multi-tasker.  Second of all, I bought all items on sale at my fabric store or with coupons.  Stores like Jo-Ann offer 40% coupons frequently and even allow you to use competitor's coupons in the same transaction.  Lastly, the amount of fabric will be enough to complete two pillows, but in order to have enough height to cut the 16x16 pieces needed for the pillow "background" you have to buy at least 1/2 yard.


You'll need 10 small petals, 10 medium petals and 5 large petals. 


Get a feel for how you want it to look--and appreciate how quickly the project is coming together!


Use Elmer's glue to adhere two small leaves to each other for some thickess.  Do this with all of the small leaves so that the 10 you cut out turn into 5 thicker leaves.  Do the same with the medium sized leaves.


Once the glued felt leaves are dry, use your embroidery floss to backstitch up the center of the petal for visual interest.  I think you'll agree that this is a worthwhile step.  It doesn't have to be perfectly straight--in fact it looks very charming with a little bit of veering off here and there.


Cut a 2" circle from your ruby felt and use a running stitch to affix it to the center of one of your 16x16 squares. 


Lay out the first round of petals and adjust them to your liking. 


When you're happy with the placement of your first later of petals, fuse the sides of the petals down with your hem tape.  Leave the center of the petal free of hem tape to make embroidery easier.  (It is next to impossible to stitch through the hem tape adhesive--I would avoid it at all cost!)


Now that you have fused the leaves to the ivory felt pillow front, use the same backstitch method that you used on the small and medium-sized petals to affix the petals to the pillow.


Next, use hem tape to affix second round of petals. Use a running stitch in the center to further affix the petals to the pillow front.  Repeat step for the small petals, too.  Then stitch bells into the center.

Sew pillow as you would any other pillow.  (If you're new to pillow-making, check out HGTV's Pillow Making 101.)


Wasn't too hard, was it?  Please let me know what you think!  As always, your constructive comments and questions are sincerely appreciated.

Interested in having one of these handmade pillows made by yours truly?  Click here for more information about a Poinsettia Pillow Giveaway!

9.29.2010

Homemade Toddler Costume - Fit for a Little Ladybug!

For all of us who aren't skilled seamstresses, the thought of a homemade Halloween costume can seem pretty daunting--but it certainly doesn't have to be.  With a few items I already had on hand and a few others I picked up at the dollar store, I was able to create a unique and adorable costume for my little Junebug.


Here's what you'll need to make this adorable costume:


Supplies: 
1. Red onesie or t-shirt (I had one already)
2. Black leggings (Purchased for $3.50 at WAL-Mart)
3. Black fabric paint
4. Antennae (purchased at the Dollar Tree for $1--I just clipped off the center decoration to turn these into quick and easy ladybug antennae!)
5. Red tights for recovering fairy wings
6. Fairy wings (Old, new, borrowed, blue--whatever you have or can get--we're just going to recover them anyhow!  I had these already but you can purchase new ones at the Dollar Tree for $1.)

Supplies needed but not shown:
-Sticker Shipping Labels (optional)
-Hot glue gun
-Sponge paint brush (one you're willing to throw away after use--they're like $ .25 at most craft stores)
-1 sheet each of red and black felt (if you'd like to make the Ladybug embellishment for the wings)
-Printable Felt Ladybug Pattern (again, this is if you'd like to make the Ladybug embellishment for the wings)

First, let's start with making the ladybug "abdomen" (or shirt--whatever you'd like to call it!). 
I used a circle cutter to cut 1" circles onto sticky shipping labels and stuck the circle templates in a random pattern onto the front of the red onesie.  Remember to place a piece of cardboard or cardstock behind the shirt's front so the paint does not seep through to the back.


Once you're happy with the placement of your circles, use your sponge brush to carefully sponge paint over the circle cutouts.  If you do not have a circle-cutter or are not concerned with perfect circles, then just paint them on by hand--there are no rules!


It'll look funky for a minute...


But look what you have after you carefully remove the circle templates:


Perfect!  Now you can set it aside to let it dry.  Now let's move onto the wings!
First of all, you'll want to remove the covering of your fairy wings until you have a naked skeleton like this:


Then, cut the red stockings right where the legs begin. 


Bunch the stockings up and slip them over the wing frame.  Use one leg of the stockings for each wing and gather all the excess nylon in the center and tie it as tightly as you can, being careful not to cause a run in the nylon.


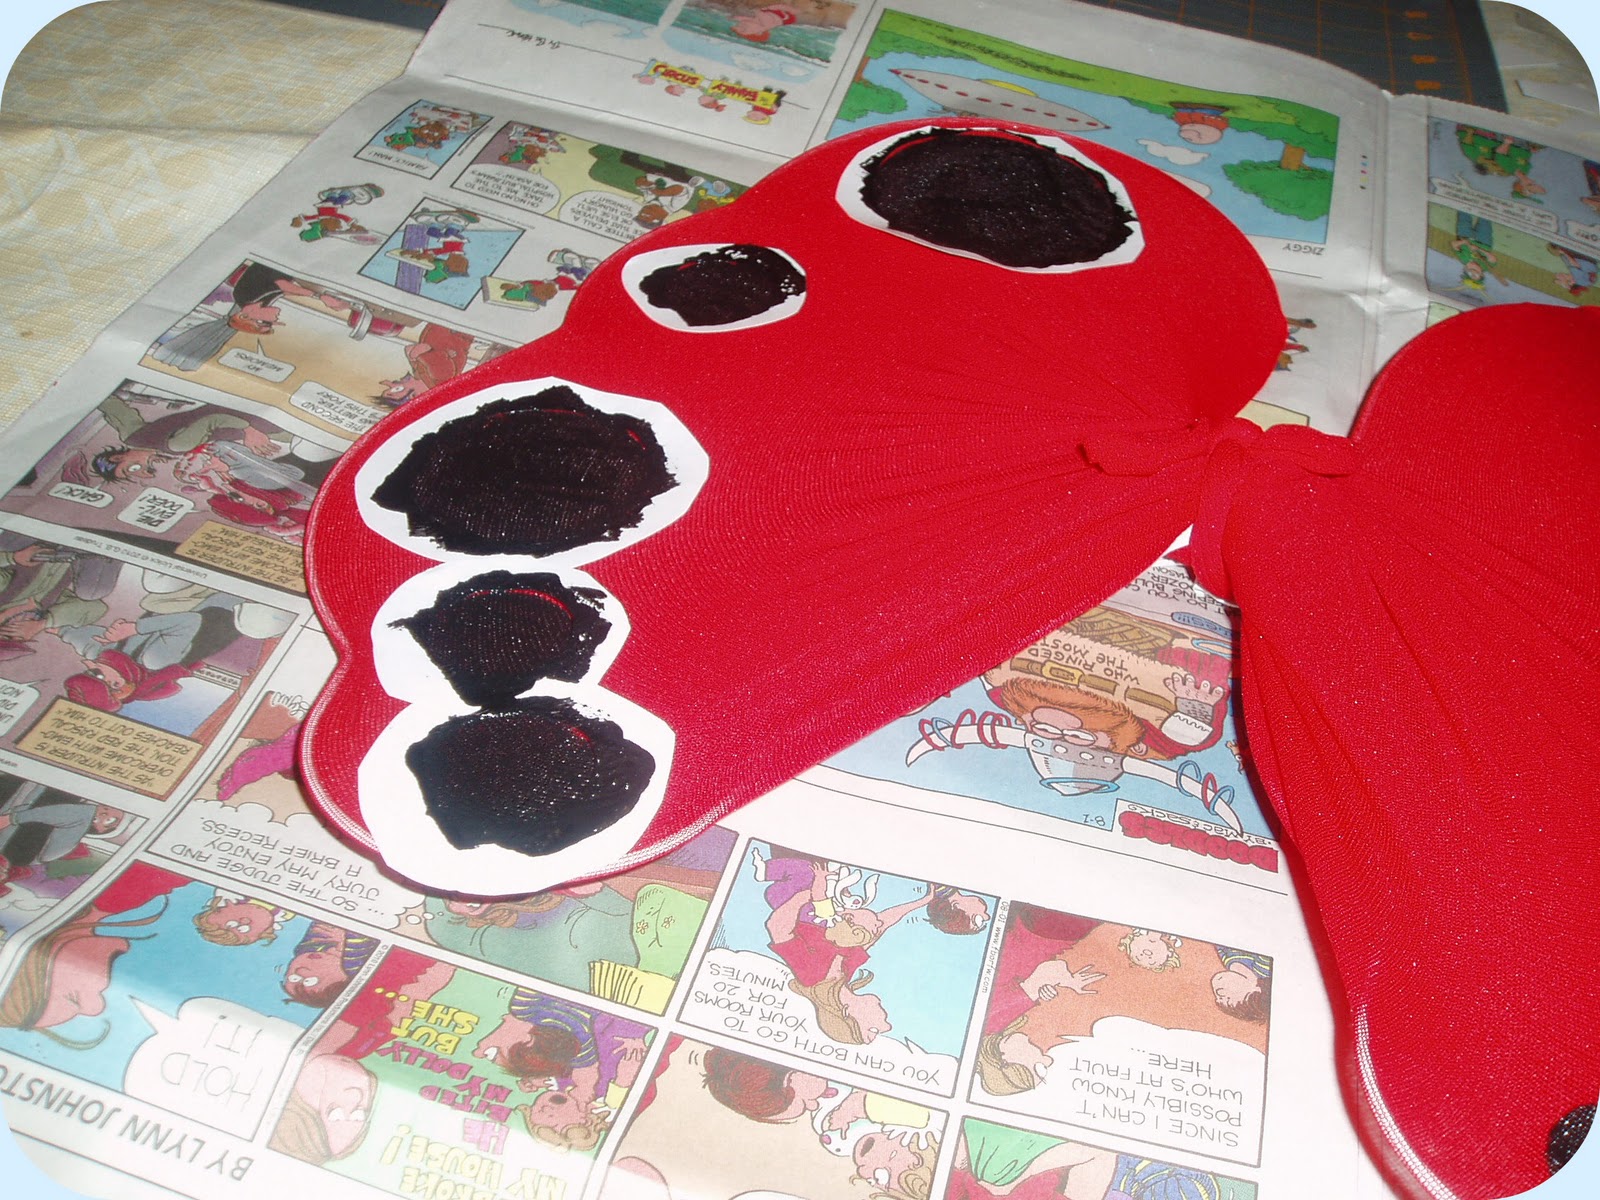
Using the same method as painting the shirt, prepare some circle templates and adhere them to the wings in the desired places.  This time I used 2.5" and 2" circles in addition to some 1" circles.  Make sure they are placed in a symmetrical pattern. 


Cover your work surface with newspaper because things can get messy now!  Carefully paint over the templates, being sure not to move the wings.  (You see, the paint will go through the nylon stockings and color the opposite side as well, so if you move the wings on your work surface, you run the risk of smudging your paint--and at that point you'll have to start over from scratch since you can't really remove fabric paint from the delicate nylon.) 


Now, remove the circle templates and proudly hang your ladybug wings on your chandelier or any other convenient place to dry.  Pat yourself on the back--you're almost done!


(You may want to paint the reverse of the dots once your first set has dried.  It's a personal preference, but I did and it made the black dots a lot stronger.)

I created a ladybug embellishment for the wings--using only some felt scraps, hot glue and fabric paint.
The printable pattern is available here.  I didn't do step-by-step instructions for assembling the ladybug because once you cut the pieces, it becomes fairly obvious as to how the assembly works--especially if you take a peek at the end result pictured below.


Simply affix the embellishment to the wings with hot glue and you've got yourself a sew-free costume!
Now try it on your little one to see how it looks...


And smile, as you realize that your sweet little one strongly dislikes the costume you made her...  At least we have some time between now and Halloween to acclimate her to wearing her wings.  (And yes, this is the BEST picture I could get of her!)

In total, I spent exactly $5 plus tax on the items needed for this costume.  I had many pieces already which was a driving factor for the theme of the costume.  It's easy to go out and purchase a costume in a store, but there's something satisfying about creating one for your precious little one.  And if you use inspiration from what you already have lying about your home, you can make a homemade costume at a fraction of the cost of purchasing one.  How's that for keeping it Spartan?

Anyone else creating a Halloween costume for a little one?  If so, what are you creating?  As always, your feedback, questions and comments are greatly appreciated!


This post is included on Sherri's Family Crafts Blog at About.com.
Related Posts Plugin for WordPress, Blogger...